


Fuchsia is an open source project supported by Google aiming at creating a new OS. The first device running Fuchsia (the Nest Hub) is now in the wild, and the whole interface was implemented with Flutter.
Being a Flutter developer, I always heard that Fuchsia was supposed to be the next big thing, overthrowing Android. Any Flutter app will run instantly on Fuchsia. Thus, using Flutter would present a natural advantage on this new ecosystem that will be pushed by Google.
All those promises seem amazing but is it really true? That's what we're gonna discover in this serie of articles.
In this first article, I'm going to cover how to start a simple Flutter app on the Fuchsia emulator. It will be divided in 2 main parts:
- Get Fuchsia to run on your local machine
- Run a Flutter app
In the second article, I will present how to install a normal app on your Fuchsia Emulator.
1. Get the Fuchsia source code
The first thing to know, is how to get Fuchsia. Even though the documentation is pretty straightforward, it can be a little bit tricky to find everything.
You can get the latest command to copy the source code here
For macos, at the time of this article, you can run the following command.
It will download all the required files. I recommand to launch this command from your home folder (~) as I ran into issues when cloning into another folder.
curl -s "https://fuchsia.googlesource.com/fuchsia/+/HEAD/scripts/bootstrap?format=TEXT" | base64 --decode | bash
It will download all the required files. I recommand to launch this command from your home folder (~) as I ran into issues when cloning into another folder.
There is 2 tools that you will be using for managing your Fuchsia installation:
- jiri: it's the tool that will help you to manage your Fuchsia git repository
- fx: it's the tool to compile Fuchsia and run the emulator.
Once the cloning is completed (I hope you have a nice connection!), you should setup your environment variables.
Once it's done, both of these commands should function properly (note that you have to be in your fuchsia directory):
jiri help
fx help
2. Compile Fuchsia for the emulator.
I ended up compiling several times the fuchsia project, because I had selected the wrong target for it. The fx set is the command you can use to choose target you are building for. If you dig a little bit deeper in the documentation, you can find all the available default targets:
bringupis a minimal feature set product that is focused on being very simple and very lean. It exists to provide fast builds and small images (primarily used in a netboot rather than paved fashion), and is great for working on very low-level facilities, such as the Zircon kernel or board-specific drivers and configurations. It lacks most network capabilities, and therefore is not able to add new software at runtime or upgrade itself. This also means somefxcommands such as fx serve and fx shell cannot be used with thebringupproduct.coreis a minimal feature set that can install additional software (such as items added to the "universe" dependency set). It is the starting point for all higher-level product configurations. It has common network capabilities and can update a system over-the-air.workstationis a basis for a general purpose development environment, good for working on UI, media and many other high-level features. This is also the best environment for enthusiasts to play with and explore.
I decided to go with the workstation variant:
fx set workstation.qemu-x64
qemu-x64 is the device I'll be targeting. QEMU is the emulator that Fuchsia is using(also used by Google to emulate Android).
Once the build target is setup, you can finally run
fx build
This step will take a lot of time the first time it's running. Subsequent builds should be much faster thanks to the caching.
3. Running the Fuchsia emulator
If the build executed without any trouble, you should be able to run the emulator:
fx vdl start
If your computer has a supported graphic chipset, you can even run the emulator with GPU accelerated graphics. I found that even though it was much faster, using the host GPU was leading to more crashes, but your mileage may vary.
fx vdl start --host-gpu
After a couple of seconds, you should have the Fuchsia emulator opened and running.
Hooray!... Well this does not look like the future! Currently, the UI interface is quite simple by default but you can test one of the included UI demo to see the capabilities of the system.
Try typing bouncing_ball in the search bar and hit enter.
Well not really impressive but the system can do more than just this console! Yet, it's still not Flutter code running. If you go in ~/fuchsia/src/ui/examples/bouncing_ball, you can see that this is not Flutter, but C++ application running.
4. Running my first Flutter app on Fuchsia
If you go look into the Fuchsia repository, you'll find some demo that are using Flutter in the ~/fuchsia/src/ui/a11y/bin/demo. Finally! A pubspec.yaml file.
If you try to run directly the a11y-demo, you will not get anything. It's because this demo is not included in the build you just did. In order to include this code, you need to rerun the fx set command with additionnal flags.
fx set workstation.qemu-x64 --with="//src/ui/a11y/bin/demo:a11y-demo" --with="//src/ui/tools/tiles_ctl:tiles_ctl" --with="//src/ui/tools/tiles:tiles" --with="//garnet/packages/prod:setui_client"
You then have to relaunch a build in order to include this new package. This should be fairly fast compared to the initial build.
fx build
You can even modify a little bit of the source code before running in order to see that is it trully you building all this!
I added a small text in the main Column just to test:
Text('Hello Bam'),
After the build process is completed, you can launch the app by typing a11y-demo in the search bar. There it is! The first Flutter app running on Fuchsia.
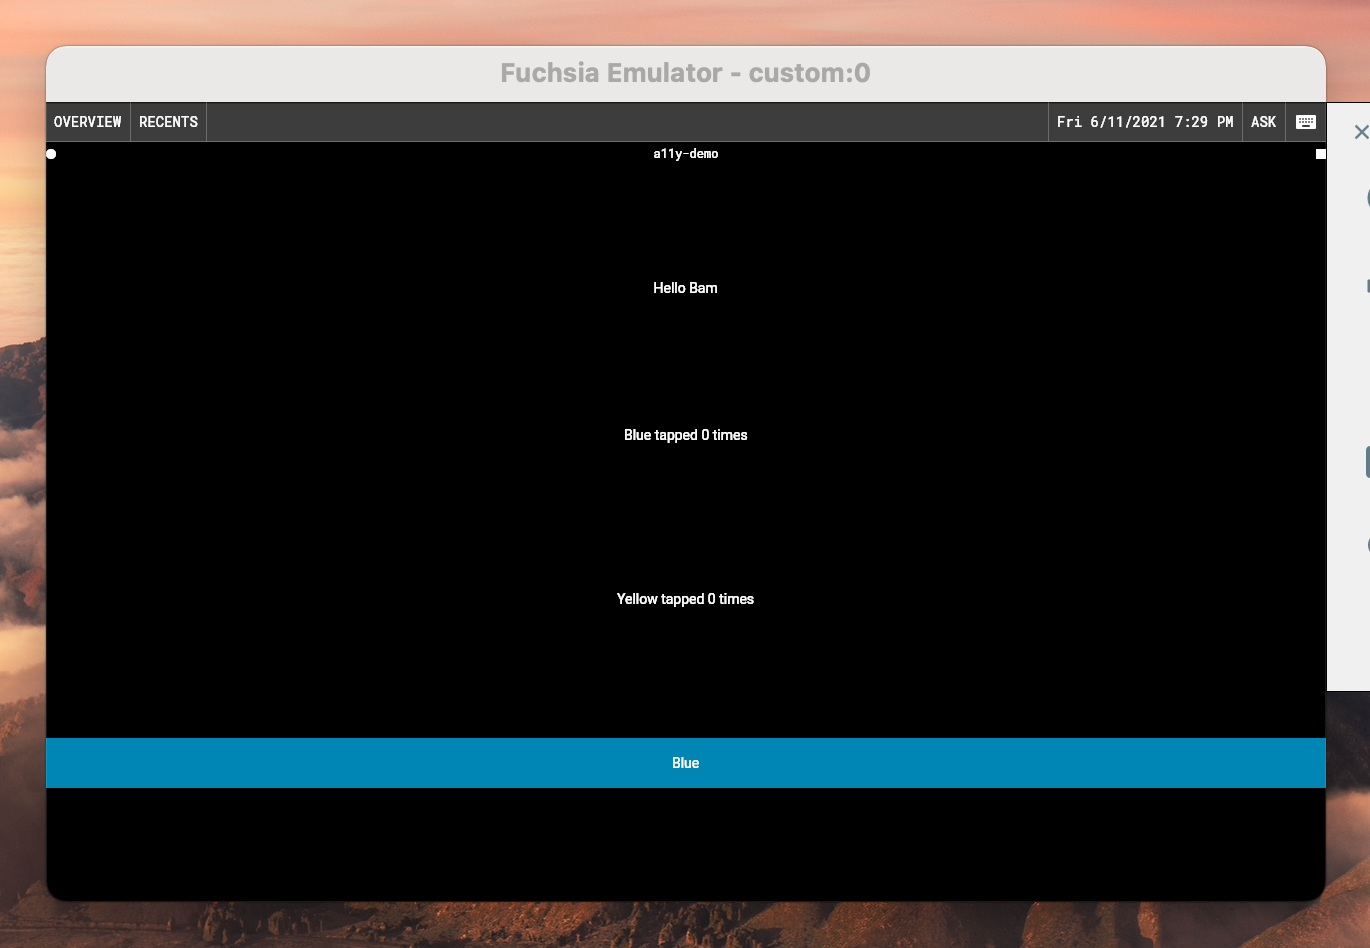
Well it's still not the most beautiful app, but it's a Flutter app running in a completetly different environment.
5. Conclusion
This concludes the first post in our serie. As the development of Flutter apps for Fuchsia keeps getting better, I will continue this serie.
The next post will be about compiling your own application and adding it to Fuchsia.
Don't hesitate to contact me on Twitter @BeGuillaume if you have comments about this article. I'm far from being an expert on Fuchsia so any feedback is more than welcome.


